
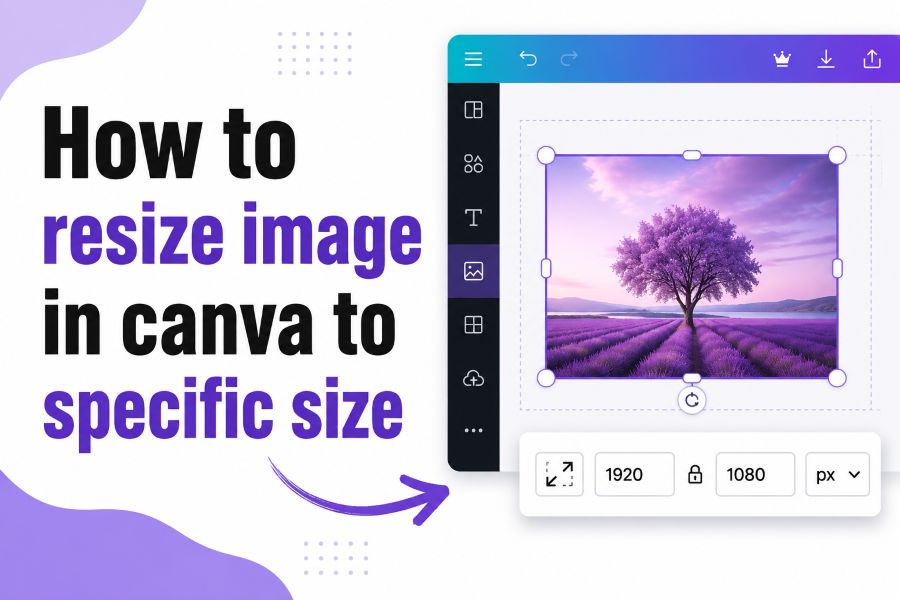
Learning how to resize image in Canva to specific size is useful when your image must fit a social media post, website banner, presentation slide, document, product listing, or print layout. Canva makes image resizing easier than many professional design tools, but beginners often get confused by one key difference: resizing a Canva design is not always the same as resizing the image inside the design.
For example, you may create a 1080 × 1080 px design, but the photo inside it may still need cropping, stretching, or repositioning. If you only drag the corners of the image, you might change how it looks on the canvas without actually creating the exact final dimensions you need. That is why choosing the right custom size, checking the crop, and exporting correctly matter.
Canva’s own image resizer explains that users can upload an image, input dimensions or choose a preset size, and then download the design as JPG or PNG. Canva also offers design resizing options such as Magic Resize for changing designs into other sizes, depending on your account and plan.
This guide shows you the practical way to resize an image in Canva to exact dimensions without distorting it, losing important details, or exporting the wrong file size.
How to Resize Image in Canva to Specific Size: What You Need to Know First
Before you start resizing, understand the difference between canvas size and image size. Canva works by placing your image inside a design canvas. The canvas has final dimensions, such as 1200 × 628 px or 1080 × 1080 px. Your image sits inside that space and can be cropped, stretched, centered, or fitted.
This matters because many beginners resize the image layer by dragging its corners and think they have changed the final file size. In reality, they may have only changed how the image appears inside the Canva design. The final downloaded image size usually follows the design canvas size, not just the image layer size.
So if your goal is an exact output, start with the exact design dimensions. Canva’s image resizer page explains the basic workflow clearly: upload the image, input a dimension or select a preset size, then download the design as JPG or PNG.
You should also decide whether your size is for digital use or print use. Digital sizes usually use pixels, such as 1080 × 1080 px. Print sizes may use inches, millimeters, centimeters, or pixels depending on the requirement. For print, pixel count and DPI both affect final quality. A simple formula is:
Required pixels = print size in inches × DPI
For example, a 4 × 6 inch print at 300 DPI needs:
4 × 300 = 1200 px wide
6 × 300 = 1800 px high
So the target Canva size would be 1200 × 1800 px for that print layout. This does not magically improve a low-quality photo, but it gives you a clear target size.
How to Resize Image in Canva to Specific Size Step by Step
The cleanest way to resize a photo in Canva is to build the design at the exact output size first, then fit the image into it. This avoids distortion and helps you export a file that matches your required dimensions.
Step 1: Decide your target size
Start with the exact width and height you need. Use pixels for web, social media, thumbnails, presentations, and digital files. Use inches, millimeters, or centimeters if your project is print-focused, but convert to pixels if the platform asks for pixel dimensions.
For example:
- Instagram-style square image: 1080 × 1080 px
- Website banner: 1600 × 600 px
- Blog thumbnail: 1200 × 675 px
- YouTube-style thumbnail: 1280 × 720 px
- 4 × 6 inch print at 300 DPI: 1200 × 1800 px
Do not guess the size. If a website, school, printer, client, or platform gives you exact dimensions, use those.
Step 2: Create a custom size in Canva
Open Canva and choose Create a design. Select Custom size and enter your width and height. Choose the correct unit, such as px, in, mm, or cm.
If you are creating a digital image, use pixels. If you are creating a print file, use the unit requested by the printer or calculate the pixel size using the DPI formula above.
Once you create the design, Canva gives you a blank canvas at the exact size you entered.
Step 3: Upload your image
Go to Uploads and add your image. Canva supports common image workflows and lets users upload an image, resize it, and download the result in formats such as JPG or PNG.
After uploading, drag the image onto the canvas.
Step 4: Fit or crop the image
Now decide how the image should sit inside the canvas.
If you want the entire image visible, resize it until it fits within the canvas. This may leave empty space on the sides or top and bottom if the image has a different aspect ratio.
If you want the image to fill the whole canvas, enlarge it until it covers the full area, then crop or reposition it. This may cut off part of the image, but it gives you a full-bleed design with no blank space.
Avoid stretching the image sideways or vertically. Stretching changes the shape of faces, products, logos, and objects. Instead, resize from the corners and crop naturally.
Step 5: Check important details
Before downloading, zoom in and check the edges. Make sure no important text, face, logo, product, or object is cut off.
If the image is for a profile picture or product listing, keep the subject centered. If it is for a banner, leave safe space around the main subject so it does not feel cramped.
Step 6: Download the resized image
Click Share or Download, then choose the file format. JPG is usually good for photos and smaller file sizes. PNG is better for sharper graphics, logos, screenshots, and images that need transparency.
Download the file and check its properties on your computer to confirm the final dimensions.
Canva Resize Tool, Custom Size, and Magic Resize: Which Should You Use?
Canva gives users different ways to resize images and designs. The best choice depends on your goal.
Use Custom Size when you are starting a new file and already know the exact width and height. This is the best option for beginners because it gives you control from the beginning.
Use Resize or Magic Resize when you already created a design and want to convert it into another size. Canva describes Magic Resize as a way to resize designs into other sizes or dimensions, and its image resizer page also says users can input custom dimensions or choose preset sizes.
Use Crop when the canvas size is correct, but the image inside the canvas needs better framing. Canva’s resize and crop guidance says users can select an element, drag resize handles, or use Crop from the editor toolbar.
Use Download settings when the design already looks correct and you only need the right file type. Choose JPG for standard photos, PNG for better sharpness or transparent backgrounds, and PDF Print for print-focused layouts if that fits your project.
Here is a simple decision guide:
- Need an exact new image size? Use Custom Size.
- Already made a design and want another format? Use Resize / Magic Resize.
- Image looks too zoomed in or badly framed? Use Crop.
- Need transparency or sharp graphics? Export as PNG.
- Need a smaller photo file? Export as JPG.
- Need print output? Check size, DPI, and print export settings.
The main thing to remember is that Canva resize tools often resize the design canvas. You may still need to adjust the image inside the design after resizing.
Common Mistakes When Resizing Images in Canva
The biggest mistake is confusing the Canva design size with the photo layer size. If your Canva design is 1080 × 1080 px, your downloaded file will usually follow that canvas size. But the photo inside may still be cropped poorly, stretched, or positioned incorrectly.
Another common mistake is ignoring aspect ratio. Aspect ratio is the relationship between width and height. A square image uses a 1:1 ratio. A YouTube-style thumbnail uses 16:9. A portrait image may use 4:5 or 2:3. If you force a photo into a very different shape, Canva must either crop it or leave empty space.
Many users also stretch images instead of cropping them. This makes people look wider, products look unnatural, and logos look unprofessional. Resize from the corners, keep proportions natural, and crop only what you can afford to lose.
A fourth mistake is exporting the wrong format. JPG is fine for many photos, but PNG is better when you need crisp text, graphics, logos, or transparency. Canva’s image resizer page says resized designs can be downloaded or shared as JPG or PNG.
Another issue is trying to make a small image much larger. If your source image is only 500 × 500 px and you resize it to 2000 × 2000 px, it may look blurry. Canva can place it into a larger design, but it cannot always restore missing detail from the original file.
For print, users often forget the DPI requirement. A design that looks fine on screen may not be large enough for sharp printing. Use this formula before creating print files:
Print pixel requirement = width in inches × DPI by height in inches × DPI
Example:
A 5 × 7 inch print at 300 DPI needs 1500 × 2100 px.
This helps you create a better Canva image size for printing instead of guessing.
The S.I.Z.E Method for Resizing Images in Canva Correctly
Use the S.I.Z.E Method whenever you need a specific image size in Canva. It keeps the process simple and helps prevent blurry, stretched, or incorrectly exported images.
S — Select the correct target size
Start by finding the exact size your platform, document, website, printer, or client requires. Do not begin with a random template if you already know the dimensions.
For digital files, use pixels. For print files, use inches, centimeters, or millimeters only if the final output is print-based. When quality matters, calculate the needed pixels using the DPI formula.
I — Input the dimensions before designing
Create the Canva file using Custom Size and enter the exact width and height. This gives your image the correct final canvas from the start.
If you already created the design, use Resize or Magic Resize if available. Canva’s resize tools can help adapt an existing design to new dimensions, but you should still check the layout afterward.
Z — Zoom, crop, and position the image
After placing the image, crop it carefully. Keep the subject visible, maintain natural proportions, and avoid stretching.
Use this mini-checklist:
- Is the main subject fully visible?
- Are faces, text, products, or logos cut off?
- Does the image fill the space if needed?
- Does it look stretched?
- Is there enough safe space around important details?
E — Export in the right format
Choose the file type based on your purpose. JPG works well for normal photos and smaller file sizes. PNG is better for graphics, transparent backgrounds, screenshots, and sharper text. PDF Print is useful for some print layouts.
After downloading, check the final file dimensions. On Windows, right-click the image and check Properties. On Mac, open the image in Preview and check Tools > Show Inspector. This final check confirms whether Canva exported the size you wanted.
The S.I.Z.E Method is simple:
Select size → Input dimensions → Zoom/crop → Export correctly
And the core formula is:
Final Image Fit = Correct Dimensions + Proper Crop + Right Export Format
This is the safest workflow for beginners, creators, marketers, students, and small business owners who need exact image dimensions without overcomplicating the design process.
Conclusion
Knowing how to resize image in Canva to specific size is mostly about setting the correct canvas, fitting the image properly, and exporting the right format. Canva gives you several helpful options, including Custom Size, Resize, Magic Resize, crop controls, and download settings. But the best result comes from using them in the right order.
Start with the exact dimensions you need. Upload your image, place it inside the canvas, crop it without distortion, and check that important details are not cut off. Then export as JPG, PNG, PDF, or another format based on your final use.
For digital designs, pixels are usually the safest unit. For print, calculate the required pixel dimensions using print size and DPI. This helps you avoid blurry output and gives you a clearer size target before you begin.
The practical takeaway is simple: do not just drag an image and hope it matches the size. Use the S.I.Z.E Method, confirm the final dimensions, and choose the export format that fits your goal.
FAQs
Can I resize an image in Canva to exact pixels?
Yes. Create a design with Custom Size and enter the exact pixel width and height you need. Upload your image, fit it inside the canvas, then export the design. The downloaded file should match the canvas dimensions if exported correctly.
Is Canva Magic Resize free?
Canva’s resize features can vary by plan and account type. Some resizing options may be available to free users, while Magic Resize is commonly associated with Canva’s paid design features. Check your Canva toolbar to see which resize options are available in your account.
How do I resize a photo in Canva without cropping it?
Create the target canvas size, upload the photo, and resize it from the corners until the full image fits inside the canvas. If the photo and canvas have different aspect ratios, you may see empty space. Add a background color or design element if needed.
Why does my image look blurry after resizing in Canva?
Your image may look blurry if the original file is too small for the new size. Enlarging a low-resolution image spreads limited pixels over a larger area. Start with a larger source image whenever possible, especially for print or high-quality digital output.
What file type should I use after resizing in Canva?
Use JPG for regular photos and smaller file sizes. Use PNG for sharper graphics, screenshots, logos, or transparent backgrounds. Use PDF Print if your design is intended for printed materials and the printer accepts PDF files.
How do I resize an image in Canva for printing?
Find the print size first, then calculate the pixel dimensions using DPI. For example, a 4 × 6 inch print at 300 DPI needs 1200 × 1800 px. Create that custom size in Canva, place your image, check quality, and export using a print-friendly format.